JavaWeb基础:Spring Framework 参考链接:
https://www.liaoxuefeng.com/wiki/1252599548343744/1266263217140032
https://boogipop.com/2023/03/02/Spring/
Spring Framework,后面还有 Spring MVC 和 Spring boot。
Spring简介 Spring 是一个支持快速开发 Java EE 应用程序的框架。它提供了一系列底层容器和基础设施,并可以和大量常用的开源框架无缝集成,可以说是开发 Java EE 应用程序的必备。
随着 Spring 越来越受欢迎,在 Spring Framework 基础上,又诞生了 Spring Boot、Spring Cloud、Spring Data、Spring Security 等一系列基于 Spring Framework 的项目。
Spring Framework主要包括几个模块:
支持IoC和AOP的容器;
支持JDBC和ORM的数据访问模块;
支持声明式事务的模块;
支持基于Servlet的MVC开发;
支持基于Reactive的Web开发;
以及集成JMS、JavaMail、JMX、缓存等其他模块。
其中 Spring 的核心是控制反转(IoC) 和面向切面(AOP) ,本文也将主要分析这两个功能。
IoC容器 容器就是为特定组件运行提供必要支持的一个软件环境,通常来说,使用容器运行组件,除了提供一个组件运行环境之外,容器还提供了许多底层服务。
而 Spring 的核心就是提供了一个 IoC 容器,用来管理所有轻量级的 JavaBean 组件,提供的底层服务包括组件的生命周期管理、配置和组装服务、AOP支持,以及建立在AOP基础上的声明式事务服务等。
先来了解一下生命周期管理和配置组装服务,其他的在后面的 AOP 和声明式事务详细说。
IoC原理 IoC 全称Inversion of Control,直译为控制反转。就是将组件生命周期管理和配置组装的控制权从应用程序本身转移到了 IoC 容器。
问题
如果一个系统有大量的组件,其生命周期和相互之间的依赖关系如果由组件自身来维护,不但大大增加了系统的复杂度,而且会导致组件之间极为紧密的耦合,继而给测试和维护带来了极大的困难。
因此,核心问题是:
谁负责创建组件?
谁负责根据依赖关系组装组件?
销毁时,如何按依赖顺序正确销毁?
解决
解决这个问题的核心方案就是 IoC ,应用程序不再需要自己创建和配置组件,直接使用 IoC 容器创建并配置好的组件就行。我们需要某种注入机制来使得应用程序可以使用到 IoC 创建的组件,通常是使用一个 set 方法,等待外部注入。
使用 IoC 前后示例代码:
使用前(为了使用 dataSource 组件,必须先正确地创建 dataSource):
1
2
3
4
5
6
7
8
9
10
11
public class BookService { private HikariConfig config = new HikariConfig (); private DataSource dataSource = new HikariDataSource (config); public Book getBook (long bookId) { try (Connection conn = dataSource.getConnection()) { ... return book; } } }
使用后(等待外部注入 dataSource 组件,不需要知道怎么创建):
1
2
3
4
5
6
7
8
9
10
11
12
13
public class BookService { private DataSource dataSource; public void setDataSource (DataSource dataSource) { this .dataSource = dataSource; } public Book getBook (long bookId) { try (Connection conn = dataSource.getConnection()) { ... return book; } } }
因为 IoC 容器要负责实例化所有的组件,所以我们要告诉它如何创建组件,并且各组件的依赖关系是怎么样的,最简单的配置可以通过 XML 文件来实现:
1 2 3 4 5 6 <beans > <bean id ="dataSource" class ="HikariDataSource" /> <bean id ="bookService" class ="BookService" > <property name ="dataSource" ref ="dataSource" /> </bean > </beans >
可以看到这个 xml 指示 IoC 创建了两个 bean 组件,并把 id 为 dataSource 的组件通过属性 dataSource 注入到了 bookService 组件中。在 IoC 容器中,所有组件统称为 JavaBean 。
依赖注入方式
上面的注入是通过 set 方法实现的,但依赖注入也可以通过构造方法实现,IoC容器允许混合使用两种注入方式:
1
2
3
4
5
6
7
public class BookService { private DataSource dataSource; public BookService (DataSource dataSource) { this .dataSource = dataSource; } }
装配Bean 学习学习具体应该如何使用 IoC 容器,又应该如何使用装配好的 Bean 。
首先需要用 Maven 创建工程并引入 spring-context 依赖:
1 2 3 4 5 6 7 8 9 10 11 12 13 14 15 16 17 18 19 <dependencies > <dependency > <groupId > org.springframework</groupId > <artifactId > spring-core</artifactId > <version > 6.0.4</version > </dependency > <dependency > <groupId > org.springframework</groupId > <artifactId > spring-beans</artifactId > <version > 6.0.4</version > </dependency > <dependency > <groupId > org.springframework</groupId > <artifactId > spring-context</artifactId > <version > 6.0.4</version > </dependency > </dependencies >
注意 spring6 版本需要使用 jdk17 及以上。
然后我们需要创建一个 application.xml 用来告诉 IoC 应该如何创建并组装 Bean,记得选择是 spring 配置文件类型,且配置文件集。
1
2
3
4
5
6
7
8
9
10
<?xml version="1.0" encoding="UTF-8" ?> <beans xmlns ="http://www.springframework.org/schema/beans" xmlns:xsi ="http://www.w3.org/2001/XMLSchema-instance" xsi:schemaLocation ="http://www.springframework.org/schema/beans http://www.springframework.org/schema/beans/spring-beans.xsd" > <bean id ="userService" class ="cn.pazuris.service.UserService" > <property name ="mailService" ref ="mailService" > </property > </bean > <bean id ="mailService" class ="cn.pazuris.service.MailService" > </bean > </beans >
文件内容的解释上一节已经说过了,另外。如果注入的不是 Bean ,而是 boolean 、int 、 String 这样的数据类型,则通过 value 而不是 ref 进行注入,主要看我们如何在主方法中使用 IoC 容器的组件。
1
2
3
4
5
6
7
8
9
10
11
12
13
import cn.pazuris.service.User;import cn.pazuris.service.UserService;import org.springframework.context.ApplicationContext;import org.springframework.context.support.ClassPathXmlApplicationContext;public class Main { public static void main (String[] args) throws Exception{ ApplicationContext context = new ClassPathXmlApplicationContext ("application.xml" ); UserService userService = context.getBean(UserService.class); User user = userService.login("bob@example.com" ,"password" ); System.out.println(user.getName()); } }
我们需要创建一个 Spring 的 IoC 容器实例,然后加载配置文件,让 Spring 容器为我们创建并装配好配置文件中指定的所有 Bean ,接下来我们就可以从容器里取出装配好的 Bean 然后使用。我们可以通过 ID 来获取 Bean,但更多时候是像这里一样,根据 Bean 的类型来获取 Bean 的引用。
使用Annotation配置 之前我们都是使用 XML 来进行配置,优点是所有的 Bean 都能一目了然地列出来,并通过配置注入能直观地看到每个 Bean 的依赖。而缺点是写起来比较麻烦,每增加一个组件,就需要将新的 Bean 配置到 XML 中。
更简单的配置方式是使用Annotation配置,可以完全不需要XML,让Spring自动扫描Bean并组装它们。主要通过注解来实现。
改造一下上一节的示例,首先删除 XML 配置文件,然后给 Bean 全部加上一个@Component注解,相当于定义了一个 Bean ,它有一个可选的名称,默认是小写开头的类名。通过@Autowired就相当于把指定类型的Bean注入到指定的字段中。和 XML 配置相比,@Autowired大幅简化了注入,因为它不但可以写在set()方法上,还可以直接写在字段上,甚至可以写在构造方法中。一般是写在字段上的。
1
2
3
4
5
6
7
8
9
10
11
12
13
@Component public class MailService { ... } @Component public class UserService { @Autowired MailService mailService; ... }
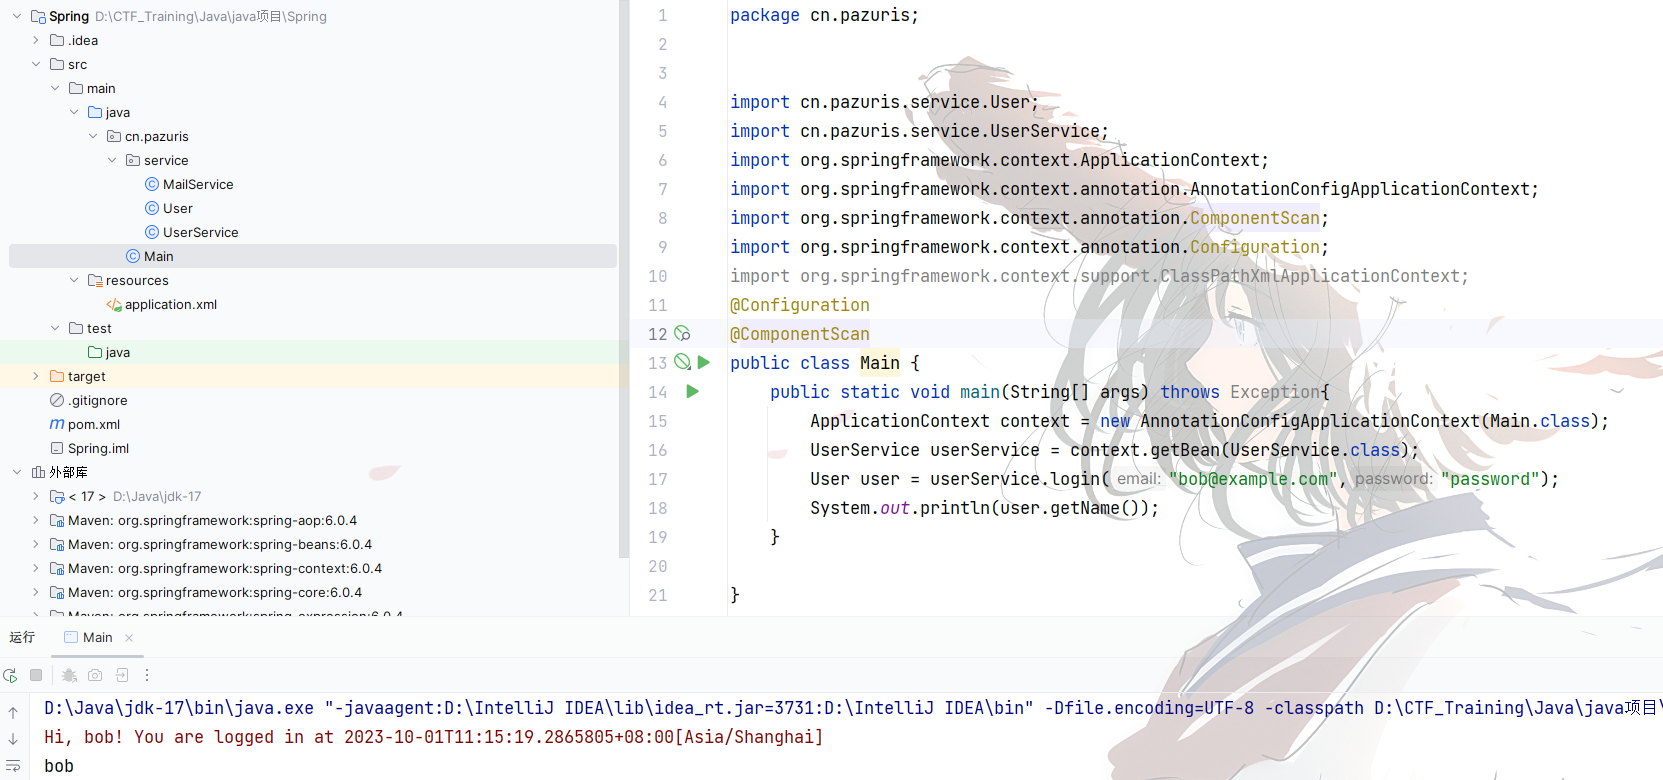
最后需要编写一个 AppConfig 类来启动容器:
1
2
3
4
5
6
7
8
9
10
@Configuration @ComponentScan public class AppConfig { public static void main (String[] args) { ApplicationContext context = new AnnotationConfigApplicationContext (AppConfig.class); UserService userService = context.getBean(UserService.class); User user = userService.login("bob@example.com" , "password" ); System.out.println(user.getName()); } }
除了main()方法外,AppConfig标注了@Configuration,表示它是一个配置类,因为我们创建ApplicationContext时使用的是AnnotationConfigApplicationContext传入的是AppConfig.class(必须传入一个标注了 Configuration 的类名)
此外,AppConfig还标注了@ComponentScan,它告诉容器,自动搜索当前类所在的包以及子包,把所有标注为@Component的Bean自动创建出来,并根据@Autowired进行装配。
使用Annotation配合自动扫描能大幅简化Spring的配置,我们只需要保证:
每个Bean被标注为@Component并正确使用@Autowired注入;
配置类被标注为@Configuration和@ComponentScan;
所有Bean均在指定包以及子包内。
需要注意包的层级结构,确保启动配置放在顶层。
定制Bean 关于 IoC 容器最后的一些内容就是关于不同注解的作用了,看看就好,随时可以查手册。
常用的下面这篇文章都列出来了。
https://www.liaoxuefeng.com/wiki/1252599548343744/1308043627200545
使用AOP AOP 是 Aspect Oriented Programming ,即面向切面编程。和我们之前接触过的面向对象和面向过程编程都不太一样,和 java 的动态代理比较类似。
一句话概括 AOP 的作用就是给类切一刀,然后在切入点前后加一些很通用的业务逻辑(鉴权或者日志之类的)。作用就是不用来回写这些业务逻辑。
使用Spring提供的切面类 首先记得导入依赖(在上文 Spring 的基础上):
1 2 3 4 5 6 7 8 9 10 11 12 <dependency > <groupId > org.aspectj</groupId > <artifactId > aspectjrt</artifactId > <version > 1.9.6</version > </dependency > <dependency > <groupId > org.aspectj</groupId > <artifactId > aspectjweaver</artifactId > <version > 1.9.6</version > </dependency >
1
2
3
4
5
6
7
8
9
10
11
12
13
14
15
16
17
18
19
20
21
22
23
package cn.pazuris.test;public interface curd { void add () ; void delete () ; } package cn.pazuris.test;public class Impl implements curd { @Override public void add () { System.out.println("add!!!!!!!" ); } @Override public void delete () { System.out.println("delete!!!!" ); } }
这两个类用来模拟数据库的操作,其实随便写点 Bean 都行,主要是为了感受怎么切面加方法。
1
2
3
4
5
6
7
8
9
10
11
12
13
14
15
16
17
18
19
20
21
22
23
24
25
import org.springframework.aop.AfterReturningAdvice;import java.lang.reflect.Method;public class After implements AfterReturningAdvice { @Override public void afterReturning (Object returnValue, Method method, Object[] args, Object target) throws Throwable { System.out.println("self after" ); } } package cn.pazuris.aspect;import org.springframework.aop.MethodBeforeAdvice;import java.lang.reflect.Method;public class Before implements MethodBeforeAdvice { @Override public void before (Method method, Object[] args, Object target) throws Throwable { System.out.println("self before!" ); } }
这两个类就是关键的,在切入面提供方法的,可以看到他们实现了 Spring 提供的 before 和 after 接口,另外可以看到是利用反射来实现的织入。
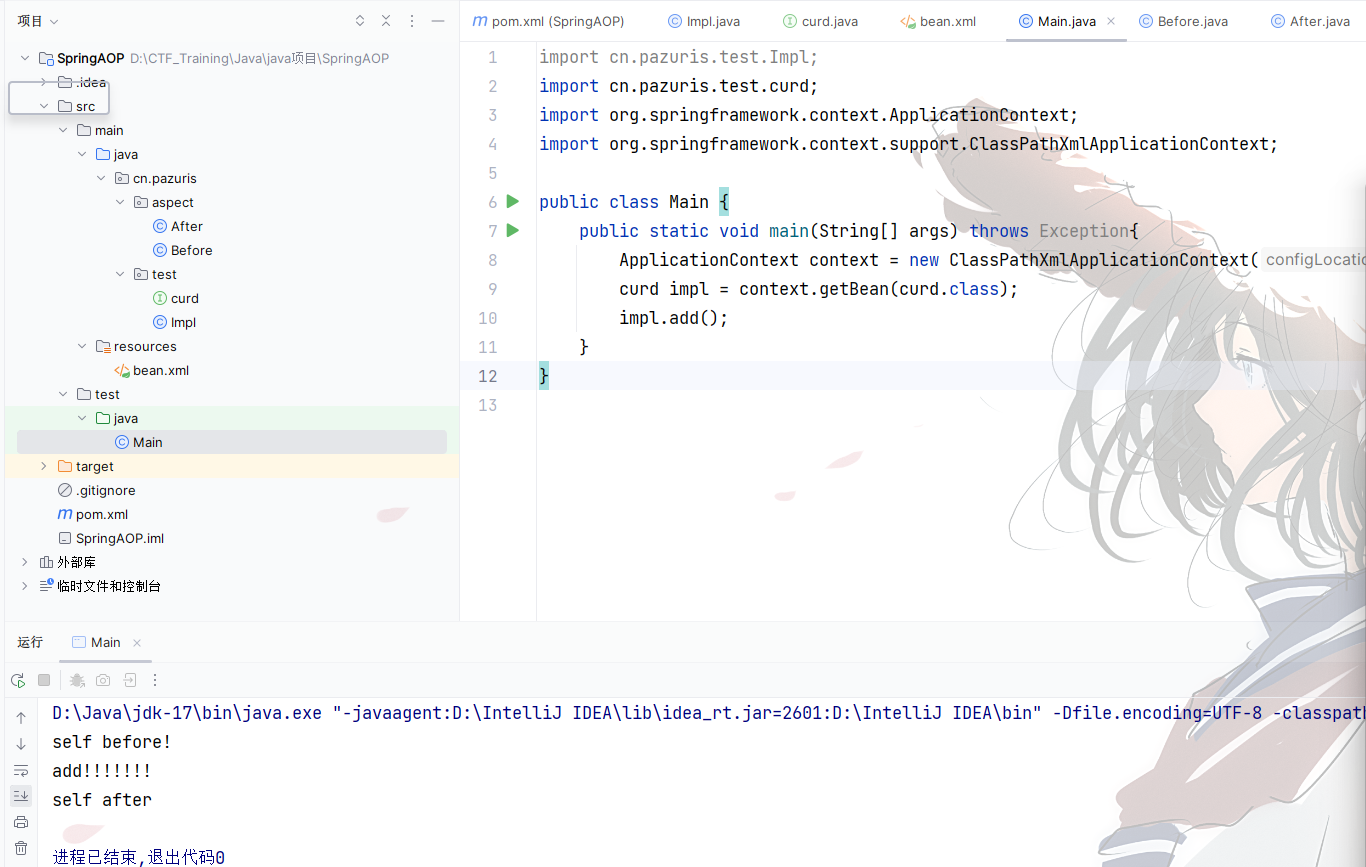
1
2
3
4
5
6
7
8
9
10
11
12
13
14
15
<?xml version="1.0" encoding="UTF-8" ?> <beans xmlns ="http://www.springframework.org/schema/beans" xmlns:xsi ="http://www.w3.org/2001/XMLSchema-instance" xmlns:aop ="http://www.springframework.org/schema/aop" xsi:schemaLocation ="http://www.springframework.org/schema/beans http://www.springframework.org/schema/beans/spring-beans.xsd http://www.springframework.org/schema/aop https://www.springframework.org/schema/aop/spring-aop.xsd" > <bean id ="after" class ="cn.pazuris.aspect.After" /> <bean id ="before" class ="cn.pazuris.aspect.Before" /> <bean id ="impl" class ="cn.pazuris.test.Impl" /> <aop:config > <aop:pointcut id ="point" expression ="execution(* cn.pazuris.test.Impl.*(..))" /> <aop:advisor advice-ref ="before" pointcut-ref ="point" /> <aop:advisor advice-ref ="after" pointcut-ref ="point" /> </aop:config > </beans >
这个 bean.xml 首先组建了三个 bean ,然后通过 aop:config 来配置 aop ,可以看到先提供了切入点 pointcut ,然后给了一个 execution 表达式,用来标志哪些方法需要切。
execution 表达式详细可以参考下面这篇文章:
https://blog.csdn.net/loongshawn/article/details/72303040
"execution(* cn.pazuris.test.Impl.*(..))"的意思就是cn.pazuris.test.Impl下的全部方法都切。
然后 advisor 来标志将什么方法插入到哪里。
可以看到运行 main 方法,就成功地在 add 方法的前后插入了我们写的 before 和 after 方法。
使用自定义的切面类 除了使用 Spring 提供的切面接口,我们也可以自己定义切面类。
写一个平平无奇的类,其方法并没有什么特殊要求:
1
2
3
4
5
6
7
8
9
10
package cn.pazuris.aspect;public class selfcut { public void before () { System.out.println("add before!!!!!" ); } public void after () { System.out.println("add after!!!!!!" ); } }
我们需要做的是在配置文件中将其指定为切面类,然后指定前和后切入的方法:
1
2
3
4
5
6
7
8
9
10
11
12
13
14
15
16
17
<?xml version="1.0" encoding="UTF-8" ?> <beans xmlns ="http://www.springframework.org/schema/beans" xmlns:xsi ="http://www.w3.org/2001/XMLSchema-instance" xmlns:aop ="http://www.springframework.org/schema/aop" xsi:schemaLocation ="http://www.springframework.org/schema/beans http://www.springframework.org/schema/beans/spring-beans.xsd http://www.springframework.org/schema/aop https://www.springframework.org/schema/aop/spring-aop.xsd" > <bean id ="impl" class ="cn.pazuris.test.Impl" /> <bean id ="selfcut" class ="cn.pazuris.aspect.selfcut" /> <aop:config > <aop:aspect ref ="selfcut" > <aop:pointcut id ="point" expression ="execution(* cn.pazuris.test.Impl.*(..))" /> <aop:before method ="before" pointcut-ref ="point" /> <aop:after method ="after" pointcut-ref ="point" /> </aop:aspect > </aop:config > </beans >
可以看到使用 aop:aspect ref= 来指定切面类的 id ,然后使用 aop:before 和 aop:after 来指定切面前后使用的切面类里面的方法。
使用注解实现 使用注解实现 aop 是最简单的,不需要再去写麻烦的 xml 配置文件,但是代码可读性会变差,不利于维护。
但是首先还是先看看用注解实现 aop ,没有省去配置文件 的做法:
1
2
3
4
5
6
7
8
9
10
11
<?xml version="1.0" encoding="UTF-8" ?> <beans xmlns ="http://www.springframework.org/schema/beans" xmlns:xsi ="http://www.w3.org/2001/XMLSchema-instance" xmlns:aop ="http://www.springframework.org/schema/aop" xsi:schemaLocation ="http://www.springframework.org/schema/beans http://www.springframework.org/schema/beans/spring-beans.xsd http://www.springframework.org/schema/aop https://www.springframework.org/schema/aop/spring-aop.xsd" > <bean id ="impl" class ="cn.pazuris.test.Impl" /> <bean id ="selfcut" class ="cn.pazuris.aspect.selfcut" /> <aop:aspectj-autoproxy /> </beans >
可以看到配置文件里面就是初始化了两个需要用到的 bean ,然后关键的一步在于开启了自动切面代理 aop:aspectj-autoproxy
然后我们需要在自己写的切面类里面通过注解标明何时插入到什么位置:
1
2
3
4
5
6
7
8
9
10
11
12
13
14
15
16
17
18
19
20
21
22
23
24
25
26
27
28
package cn.pazuris.aspect;import org.aspectj.lang.ProceedingJoinPoint;import org.aspectj.lang.annotation.*;import org.aspectj.lang.annotation.After;import org.aspectj.lang.annotation.Before;@Aspect public class selfcut { @Before("execution(* cn.pazuris.test.Impl.*(..))") public void before () { System.out.println("add before!!!!!" ); } @After("execution(* cn.pazuris.test.Impl.*(..))") public void after () { System.out.println("add after!!!!!!" ); } @Around("execution(* cn.pazuris.test.Impl.*(..))") public void around (ProceedingJoinPoint jp) throws Throwable{ System.out.println("环绕前" ); Object proceed = jp.proceed(); System.out.println("环绕后" ); } @AfterReturning("execution(* cn.pazuris.test.Impl.*(..))") public void afterreturn () { System.out.println("after return" ); } }
此外可以看到这里除了 Before 和 After,我们还使用了 Around 和 AfterReturning ,从输出结果可以看到切入后他们执行的先后顺序(Spring6下)
此外需要注意的是 around 中一定要手动 .proceed 来继续执行原来的方法,不然就断掉了。有点像拦截器。
全注解实现
全注解需要实现一个配置类,并且写入我们定制的 Bean :
1
2
3
4
5
6
7
8
9
10
11
12
13
14
15
16
17
18
19
20
21
22
23
package cn.pazuris;import cn.pazuris.aspect.selfcut;import cn.pazuris.test.Impl;import cn.pazuris.test.curd;import org.springframework.context.annotation.Bean;import org.springframework.context.annotation.ComponentScan;import org.springframework.context.annotation.Configuration;import org.springframework.context.annotation.EnableAspectJAutoProxy;@Configuration @ComponentScan @EnableAspectJAutoProxy public class config { @Bean public selfcut selfcut () { return new selfcut (); } @Bean public curd curd () { return new Impl (); } }
比之前的多了一行开启自动切入代理的注解,然后切入类并不需要改变,主方法中改一下获取 context 的方式即可,整体来说还是比较简单的。
Spring Framework 就先看到这里了,学习了两个最核心的功能,后面的配置访问数据库和声明式事务可以以后又遇到再研究。下次就该是 Spring MVC 和 Spring boot 了。话说也差不多到时间开会议给新生讲题了()。